


This project idea came from Lisa at SULateNight Stampers; THANKS LISA! This plaque is a great gift idea; change it from a Christmas theme to birthday, etc. You can include the ribbon to allow it to be hung or create without the ribbon and display it on a small dish holder/stand. The base is one small On Board Book Basics, I used the Cocoa Speciality dsp from our Holiday Mini. The ribbon is our 3/4" Real Red Grossgrain polka dot. I embossed the strip of Real Red c/s with the Petals a Plenty textured folder also found in the Holiday Mini.
NOVEMBER 30TH I am giving a free gift of 8 1/2 x 11 c/s when you place a $50 order on my Stampin Up website! Order supplies to make your Christmas cards this year OR the plaque above! AND receive one package of your favorite cardstock FREE as a gift from me! Thanks for visiting!
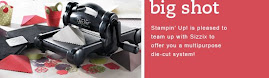
 I loved this project. It took a little while but it was MUCH MUCH fun. I got the idea and instructions from Connie Stewart from the Yahoo Group StampinUpLNStampers. Is it not the cutest? I used our On Board Book Basics (small) for the top of the message center, I sponged it with Dusty Durango. I then used the Big Shot to cut 6 Top Notz. The one I used on the top layer is with our Melon Mambo, I then used our Razzleberry Lemonade dsp to cut the other Top Notz. I cut a 1/4 piece off of one and layered it on the Melon Mambo for the top layer. I then used our Dusty Durango polka dot ribbon to attach the other pieces. The second and third layer used 2 top notz each; one as the top layer, then after adhering the ribbon I adhered the other top notz to hide the ribbon and complete the look.


 I discovered this project last year on another site; ChickenScratch I believe. I love post-it note holders! They are a great gift idea for co-workers and teachers! I had to change the dimensions of this holder as the post-it notes are larger than the regular ones normally found on a desk. I found these post-its at a discount store and HAD to buy these Christmas themed ones JUST FOR these holders!! I used Sahara Sand cardstock and Holiday Lounge dsp on the holder above. I'm also including a picture of the post-it notes I used with each holder. I made the holder below with more traditional colors, Read Red cardsock and Merry Moments dsp. The sentiment on both is from Teeny Tiny wishes which I punched with the Word Window punch then the Modern Label punch. thanks for visiting!

 Then I thought...why not a Christmas frame? So I used the Holiday Lounge dsp and our new ornament punch...then used the Big Shot again but with our Joyful die this time for an added element. Add a little ribbon...well you get the picture...ok, NOT funny! LOL! (sorry for the glare on the photo) THANKS FOR VISITING!


