Monday, September 28, 2009

FANCY BOX

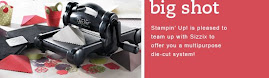
Here is a fun treat box made with the Fancy Box die and the Big Shot. I made this with our halloween paper but this box is awesome as a wedding favor or shower treat box! I used the large oval punch to punch the face of the box then adhered a window sheet for a little "peek-a-boo" effect. Thanks for visiting!

Thursday, September 24, 2009

A TREAT BOX

A regular size Hershey bar fits inside this halloween treat box. This may look hard but it's actually pretty simple to cut, score, and put this box together. I used Perfect Plum c/s, Cast a Spell dsp and Scary Skeleton stamp set (both in 2009/2010 catalog); I embossed the skeleton with black embossing powder to make it pop. I hope you enjoy it. Thanks for visiting.

Sunday, September 20, 2009

TRICK OR TREAT CARD

Here is a fun card for the halloween season. The card base is Kraft and I layered Whisper White on Crushed Curry. The sentiment is stamped with black Staze-On and is one of the stampsets from our Level 1 hostess sets, Holiday Best. I layered it on Kraft and Pumpkin Pie. The ribbon is Crushed Curry polka dot...LOVE IT! Then I used our Fall Harvest wheel to add to the pumpkin in the sentiment stamp. Thanks for visiting!

Friday, September 18, 2009

PUMPKIN "PUNCH"


Hi! The pumpkin on this card was made with three punched ovals from the Wide Oval Punch (#112082), I then sponged the edges with Chocolate Chip ink. I used Whisper White and layered Basic Black under a layer of Whisper White. The sentiment stamp is from a Level 1 Hostess gift, Holiday Best. Host a party to receive your own stamp set! Just contact me at jamnscrappin@gmail.com. As you can see I used the striped ribbon again but this time in Old Olive! Thanks for visiting.

Sunday, September 13, 2009

BOO!


A quick halloween card. I just love the tone-on-tone circles on the Pumpkin Pie cardstock, don't you? It's an EASY, cost effective way to change up the look of your cardstock and add some dimension. What do you think of that new wide striped ribbon? I love it and you will too once you try it. It ties like a dream! Thanks for visiting!

Friday, September 11, 2009

Halloween Treat Bag

Wanted to post this cute gift bag. Its made with a small orange paper bag and our Cast-a-Spell DSP. Simple and easy...want the project? Purchase $5 or more on my Stampin' Up! website and you'll receive all you need for one treat bag FREE! Thanks for visiting!

Saturday, September 5, 2009

FRANKIE INSTRUCTIONS

Gather your supplies; Green Galore, Basic Black, Whisper White and Elegant Eggplant c/s. Also ribbon for embellishment and a regular package of popcorn.
Cut Green Galore c/s to 6" x 10"
Cut Black c/s to 2 1/2" x 10"

Score both Green Galore and Black (at the 10" side) at 4, 4 1/4, 8 1/4 and 8 1/2
Give Frankie some bangs, I just cut triangles out to leave a zig-zag bang

Punch 2 circles out of the Green Galore with 1 3/8" circle punch; cut both in half...2 halves will become the eyelids and one half will become the nose. Sponge all three halves with Green Galore Classic Ink


Punch 2 circles out of the Whisper White with the 1 1/4" circle punch, these will be the whites of Frankies eyes

Punch 2 circles out of the Black with the 1" circle punch, these are Frankies eyes. Use white gel pen as indicated in picture
Lay Black on the Green Galore to determine appropriate distance to place eyes, use snail to adhere black circles to white then adhere to Green Galore "face", adhere eyelids with dimensionals


Adhere nose with dimensionals
Draw on mouth, there is no right or wrong way, be creative


Punce piece of Elegant Eggplant with Round Tab punch. Cut in half, these are your neck "bolts"
Use exacto knife to cut slit between scored parts on each side of Green Galore face, this is where you will insert the neck "bolts, don't cut too low or you'll cut through the Green Galore
Insert neck "bolt"
Place small piece of sticky strip on inside of "bolt" and adhere to Green Galore

Adhere Black bangs to Green Galore with sticky strip placed at the top

Add sticky strip to Green Galore and wrap around popcorn


Punch tag with Black c/s with large tag punch, punch tag with Whisper White c/s with small tag punch; stamp sentimate on small tag; adhere small tag to large tag with snail; punch top of tag with 1/16" punch

Punch top right of Frankies head with 1/16" punch; adhere tag here using ribbon

SEE COMPLETED PROJECT BELOW. HAVE FUN FRIENDS!! Thanks for visiting!

Thursday, September 3, 2009

FUN FRANKIE FREEBIE!!

This is a fun cute project. I've seen Frankie on a lot of different sights and it appears we all have our own versions. I use green galore, basic black, whisper white and elegant eggplant. It's very easy and makes a simple package of microwave popcorn a unique halloween treat. But here's where the FREEBIE comes in...how would you like to receive the cardstock and embellishments you need (minus the popcorn) to complete this project?


Cut and scored cardstock, punched cardstock, and ribbon. FREE??? I will mail the complete project to you and all you have to do is leave me a COMMENT on THIS post. I will draw 20 names then I'll e-mail you and ask for your address and put your gifts in the mail!! No strings attached, just a fun project to share with you and perhaps you can share with others. Tomorrow I will post the step by step instructions to complete it. THANKS for visiting!

Tuesday, September 1, 2009

HOLIDAY MINI PROJECT SAMPLE

Here is a card I created using the new Stampin' Up! textured impressions folder, Petals-A-Plenty. The image reminds me of mistletoe! I also used the new Misletoe ribbon and some of the gold elastic cord both from the mini. The tag was made with the Stampin' Up! Lots of Tags Sizzlets; I used the Sweet Season stamp set from our 2009-2010 Idea Book and Catalog. Click on the Holiday Mini in the previous post below to view the more than 60 FANTASTIC new items! Thanks for visiting!

HOORAY FOR THE NEW HOLIDAY MINI!

Stampin' Up! has outdone theirselves this year with an awesome Holiday Mini jam-packed with FANTASTIC products! STAMPS and RIBBON and DIES...OH MY!!! I'll post a couple of projects using the products later tonight, until then, click on the picture and ENJOY!