
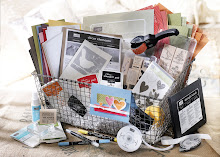
One of the exciting things happening next month is Sale-a-Bration (SAB)! For every $50 ordered you will receive a FREE stamp set! But the exciting part about this years SAB is that not ONLY are stamp sets available as FREE items...you also have the choice of selecting a paper pack! OR one of our new scallop trim border punch! OR you can select ANY stamp set in the current Idea Book and Catalog up to $15.95 value! BUT WAIT, THERE'S MORE! Stampin' Up! is also introducing CLEAR MOUNT rubber stamps this year!!! The stamps are made with our same quality rubber stamps and foam BUT are stored in thin cases and are then placed on clear blocks when you are ready to use them. I FINALLY tried my set today and was surprised at how easy it was and I actually rather liked it! I definetly see myself buying more of these! Talk about minimal storage needed! WOW! But fear not, if you prefer wood mount stamps, they are NOT going away, but rather you have an OPTION of either!! How cool is that? So this card is made with one of the sets from SAB and I used the clear mount as I indicated. Please contact me if you would like to receive a SAB mini catalog. Below is the stamp case! Can you believe how thin it is? Please contact me if you want to know more about Sale-a-Bration! Thanks for visiting!


 I think that's what this technique is called. I made one in a class when I attended Convention in 2007. I wanted to do something a little different for a Valentines card and thought I'd give this a try. The dsp I used is from the Holiday Mini, Christmas Cocoa! Doesn't it look great as Valentine paper? This dsp is still available until January 4th...yes, I bought more!! I also used Real Red c/s and Whisper White. That is what is on the first "step" of the card, I used our new small heart punch and our new I Heart Hearts CLEAR MOUNT stamp set both of which are in the Occasions Mini catalog. Please contact me if you would like an Occasions Mini. Thanks for visiting!


 So this morning my daughter comes over while I'm sitting on the couch enjoying my first cup of coffee...Mom! I need a gift bag, quick!! She was on her way to work. I quickly thought, well, I have some white bags I'll stamp some snowflakes on one. I stood to go to my stamp room and took a sip of coffee...I looked at my new mug; a gift from Michelle at work...THAT'S IT!!! And this gift bag was born! Very simple; Real Red and Basic Black c/s and Glossy White c/s. I used Iridescent Ice on the "belt" then inked the hodgepodge hardware "belt buckle" with gold ink. Easy Peasy! Thanks for visiting!

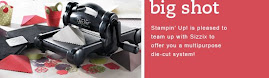
 I created this for my 9 year old grand daughter, Jaelyn. She is forever losing her barrettes and I just KNOW this will solve her problem...for about a week!! LOL! Unfortunately the dsp is retired; I thought I was using Tea Party but it turned out to be something else! Sorry but the ribbon is also retired! It's from our last catalog; Pink Piroutte, it was the perfect size to hold the barrettes though and PINK, I mean what girl doesn't like pink?? I covered onboard long board with the dsp before cutting it with my Big Shot and the Scallop Circle #2 die. Did a little decorating and it was ready to be gifted. Thanks for visiting!


